Dynamic Duo #1: MAC Margin and Maybelline Fresh Rose Blushes

Hi everyone,

I've interviewed many makeup artists lately and they all said the same thing: when it comes to blush, use at least 2 colors. I am a monochrome kinda gal when it comes to blush but it took a bit of coaxing from a Bobbi Brown makeup artist to make me realize the importance of using 2 blushes. You look more natural, that's all!


Both Margin and Fresh Rose blushes are gifts, one from MAC team and another from my mom. Margin (the one on the left) doesn't look much in the pan. It looks like dirt with shimmer. My initial reaction was, "That's it?" and I pretty much did not have so much hope for it. But when I came home and applied it on my cheeks, wowza! It is this very light and fresh peachy color with a nice sheen, not too much shimmers to make your cheeks look all disco-ball but just a nice sheen.

Maybelline Fresh Rose on the other hand is just what it is: a nice rosy matte pink color. It's quite dry, not as soft and buttery as Margin when dusted on my cheeks. But since it is free and the color build-up is lovely, I've been using it non-stop.


And here's the trick to get the best blushing cheeks ever:

1. You need 2 colors: a lighter one to apply all over your cheeks and a brighter one to apply just on the apple of your cheeks. Depending on your skin tone, they can be either pink or peach. You can mix and match peach with pink like I do but if you want to be safe, just use 2 colors in the same family (warm or cool.)

2. With a fluffy blush brush, apply the lighter color all over your cheeks. Remember to smile!

3. Then, with a smaller blush brush with the size of the head a tad bigger than a quarter, brush the brighter blush just on the apple of your cheek. If you don't know what it is, smile and see the fleshiest part of your cheeks that protrude up on your face. You apply very lightly, skimming the bristles on your skin, not pressing the brush down at all.

4. Then, use the bigger blush brush and lightly blend everything together.

The reason I love Margin so much is the sheen: I don't have to use a highlighter at all. However, if you are around the NC-25 area like me, this is a tricky blush to use. You don't seem to notice it when you apply, but it is there bright and clear when your face is on film. I was a little bit heavy-handed with Margin before I went to an event and seriously, I looked like I was drunk. So, lesson learned: a little bit of blush goes a looong way. And also, blend well!

With love,
Dao xoxo


P.S: Please show your support by following my blog and subscribing to my feed. Thanks a lot!

Antagonizing over Maybelline Clear Smooth BB Cream

Hi everyone,

Last Friday, I mentioned BB Cream as something trendy in this year. I had no idea I would write a follow up about something closer to home: I have been using Maybelline Clear Smooth BB Cream for a while now. After having various degrees of success with Maybelline Clear Smooth BB Silk Shine Free Two Way Cake Powder, I pushed my own button and bought the BB Cream itself. Maybelline is available here in Vietnam and the prices are affordable. On top of that, the cream was 10% off and I received Baby Lips as a gift with purchase.


 I believe this Clear Smooth BB Cream is available in the Asian market only. Outside of Asia, Dream Fresh is the BB Cream Maybelline sells. Since I don't have the later one, I don't know whether the formulas are different but based on past experience between Maybelline products in the U.S, U.K, and Japan, I believe the formula varies if the name is different.

Unlike many other makeup products, this BB Cream comes in a small tube with only 18ml of cream. To put into perspective, a deluxe foundation sample contains around 5-7.5ml. Which means there's not a lot of products to slosh around. The reason people think it's big is because of the packaging. There's simply too much plastic and paper involved in this product. I wish Maybelline to simplify its packaging in the future.


This BB Cream comes in 2 colors: Fresh and Natural. Mine is Fresh, which is a tad too light for my skin. Natural, however, is too dark but has more yellow pigments in it, which makes it more flattering on Asian skins. Fresh, on the other hand, is your typical Asian BB Cream shade: it has this beige color that does not fare well with any skin tones. Once applied, I looked white. Like Michael Jackson white. Like unhealthy ghostly white. Like really, really white.

It freaked me out a little. So I waited for it to oxidize, which it did for a moment to make my skin look kinda pumpkin like before I looked less white again. But still, my face was lighter than my neck unless I applied some bronzers to even things out around the jaw line.

Texture-wise, it is creamy in the way of a strong non-oil free moisturizer. My face felt very comfortable for the first few minutes before it looks greasy. And greasy it is! This BB Cream creates the greasiest mess on my face since I started puberty. I've come to learn that using silica microspheres as a finishing powder would eliminate this problem. Yes, that's the stuff in Make Up For Ever HD Powder, ELF HD Powder and the like.

To fix the weird whiteness problem, I mixed this BB Cream with my MAC NC25 foundation and it looked less pale, more human. Also, since my MAC foundation has lots of oil-controlling properties, the mix created a dewy look that was so beautiful! Reader Laura Humphries mentioned using her new CoverGirl Outlast Stay Fabulous Foundation on top of her Two Faced BB cream and had a dewy finish as well. You should give that a try, too.

Here is a list of pros and cons:

Pros:

  • Affordable: cost me around 4 USD and I had a free lip balm
  • Can be applied with fingers, although a dual-fiber brush provides much better texture
  • Can conceal dark circles to a certain extend
  • Feels very comfortable on skin
Cons:
  • Has only 2 shades: therefore, those with darker skins or are in between shades can't use it
  • Light shade has weird alien white color
  • Is greasy!
  • Packaging is bulky!
  • Needs a lot of creative energy to make it more wearable
While I love this BB Cream, I don't think it's for me. Those with dry skin can benefit greatly from it as it moisturizes well. However, those with oily skin can move a continent away from this thing. The finish is fabulous, which makes this a regret for me. I truly hope the Dream Fresh BB Cream to be better as Maybelline seems to have many great products lately.

Here are some extra pictures:


The promises: surprisingly, it does all of those,
especially the brightening part to the point of whiteness!
Ingredient list

Ok, here are two interesting pictures: unblended BB Cream on the left and blended on the right. Look how much brighter the skin on the right hand picture looks :)

Last but not least: would I buy it again? Hell to the no! Or maybe when I reach my 40s and my skin gets much drier. Maybe.

With love,
Dao xoxo

P.S: Please show your support by following my blog and subscribing to my feed. Thanks a lot!

Trendy in 2013: BB Creams

BB Creams
Hi everyone,

BB Cream is not exactly new in the makeup world. Fans of Korean makeup have been exposed to this type of face cream-slash-foundation for ages. In the Asian market, Maybelline has its own BB Cream for a while now. Yet, at the end of 2013, beginning of 2013, BB Cream finally becomes popular to the rest of the world. And by popular, I mean everybody does BB Cream these days. Not only mass-market brands such as Garnier, L'Oreal, and Physicians Formula have their own versions of this cream but also the big brothers like Armani and Dior do, too. This sends a chill to my spine. Finally, BB Cream has taken off the same way as mineral makeup did back in 2008.

Contrary to popular belief, BB Creams are not that miraculous. Sure, they have more moisturizing properties and make your skin look and feel better than foundation but still, BB Creams are makeup. Therefore, proper cares should be partaken the same way as when wearing liquid foundation.

The one thing I am glad to happen within this wave of Western BB Creams is the color selection. Korean BB Creams are notoriously bad in term of color: in certain brands, you can only find 1 (yes, one!) shade and often times, it is in a weird pale greige (grey+beige) color that in no way flatters Asian skins at all! On top of that, the shades - if more than 1 shade is available at all - tend to run really, really ghostly white, so white that white girls have problem wearing them as well. Moreover, they almost always oxidize to some other weird pumpkin colors. And when you find a shade that matches your skin, it would oil up after some use.

Yes, a lot of Asian BB Creams are tres weird. With this new crop of BB Creams coming from the West, they seem to be better in term of everything: color selection, texture, lasting power, and especially oil control property. If you haven't tried BB Creams yet, you should jump onto this bandwagon. I've heard lots of nice things about Rimmel London and Physicians Formula. Please give it a try and tell me what you think!

With love,
Dao xoxo

P.S: Please show your support by following my blog and subscribing to my feed. Thanks a lot!

A Tiny Guide on MAC Mineralize Products for the Allergic

Hi everyone,

I have this weird unrequited love with MAC Mineralize products: I love them but I can't use them. After trying and owning Northern Lights, my first mineralize skin finish, for 3 days, I realized there was no way this relationship could work. Northern Lights was a LE product that was pigmented enough to be used as a blush. I could illuminate my cheeks like no other. But after a couple of minutes on my skin, I started feeling some tingling sensations.

I didn't know I am allergic to bismuth oxychloride. It turns out to be a somewhat common contact allergy caused by makeup. And for some reasons, some MAC mineralize products contain this ingredient but you have to look very closely in the "May Contain" section to spot it.


Years passed and one day, I went to an event and got 3 MAC Mineralize products as door prize. I scratched my head thinking, "What am I going to do with thee?" And then, I went home, put on a wad lot of primers before I applied the makeup. And voila, almost painless!


1. Mineralize Satinfinish SPF15 Foundation

I have to admit I was crazy not to use a skin primer before applying it. But to my surprise, I didn't feel a thing, which means this product does not contain bismuth oxychloride. The one I got is in NC 25, which is a tad too dark for me.

The Mineralize Satinfinish foundation is definitely not a daytime foundation. The pearlize micro particles gives the skin a nice sheen, which is nice when you do photo shoots or have a romantic candlelit dinner. But for daytime, the particles are very visible. The coverage is good (medium to full and buildable) and if you use a stipple brush, you'll get that dreamy matte finish with a glow.

2. Mineralize Concealer

As you may know, I use this concealer as a highlighter and it does a pretty nice job. When it comes to concealers, if your skin is in the NC range, you should use an NW concealer to counter the darkness. The same thing for NW people. Since mine is an NC20 concealer and my skin is indeed also NC20, it only makes sense to use this concealer to highlight instead.

While the good news is the Mineralize Concealer has a rad wand that can reach into tiny crooks and crevices, the bad news is it also contains bismuth oxychloride. This means whoever is allergic to it (me, me, me!) is going to receive the tingling sensation. I do feel it whenever I skip the whole face primer and foundation thing to go straight to concealer. However, if I spackle my face well with primer, I don't feel it as badly and the tingling sensation does go away after a while.

3. Mineralize Eye Shadow

MAC Mineralize Eyeshadow in Mineral Mode
MAC has 2 types of mineralize eye shadows: one that looks like Mineral Mode above with only 1 major color and lots of veins and another one that is a duo eye shadow (like Engaging here.) As far as I've known, the formulas of these mineralize eye shadows vary: one can be quite hard and has major fall outs while the other is as smooth as butter. They are almost always packed with pigments and the frosty finish is amazing!

However, the main concern is bismuth oxychloride and The Force is strong in this one. To be honest, the only way I can wear it is to apply a thick layer of eye shadow primer like a shield and make sure I don't apply anything on my lash line as well as avoid fall outs to touch my skin. Crazy, I know. But one touch of it and my eyes will start to water. This is a real shame because I do love mineralize/baked makeup because of aesthetic reason: they do look pretty in the pan.

4. Mineralize Skinfinish

(L-R): Mineralize Skinfinish in Northern Light and Parrot eyeshadow
Vintage LE in 2008!
You think I would blog about MAC mineralize products without mentioning the most famous item, don't you? Now you have it: I did own an MSF for a brief period of time (1 week) before realizing that tingling sensation was not normal. It was a heartfelt bid of adieu on my part to return Northern Light to the counter. It was perfect as a blush with all those gold veins! But for my own skin's sake, I had to do what was best for me.

There are two types of MSF and it's a bit confusing when you go to the store asking for one and receiving another. First of, there is the regular colorful MSF with veins like Northern Light. And then, you have Mineralize Skinfinish Natural, which is a powder for your face. It does give a very pretty glow-from-within look and I've seen a lot of makeup artists using it on people's skins. The MSF Natural does look amazing.

But again, bismuth oxychloride. Sometimes I wonder why pretty things can be so lethal.

To conclude: while Mineralize Satinfinish foundation is something everyone can use, the rest is not for those with bismuth oxychloride sensitivity. The mineralize range is extremely pretty in term of colors and finishes. I do wish MAC to reformulate this range to make it more usable to those who have sensitive skins and allergy to bismuth oxychloride.

My own personal conclusion: while I do love 'em, I can't use most of them. The ones I have are mostly gifts that I keep just for show :) They are too pretty (and expensive) to be in the trash.

That's all for now. How about you? Do you have any other experiences with MAC mineralize products?

With love,
Dao xoxo


P.S: Please show your support by following my blog and subscribing to my feed. Thanks a lot!

Concealer Tricks to Banish Raccoon Eyes

Hi everyone,

When I was in my 20s, I could stay up really late to study and still looked fresh in the morning. But only a few years into the 30s wonderland and here I am needing concealer like a calf needs milk! When I got a chance to interview James Molloy from MAC, one of his tips is to really conceal the dark circles under and around the eyes. He prefers to bring lights to a woman's face and I took his advice. A little bit of well-blended concealer can make you look wide awake and take years off your age. Trust me, I know!

Lately, I have found an effective way to conceal my raccoon eyes. It's not cakey and the products I use are not outrageously expensive (YSL Touche Eclat, I'm looking atcha!) If you have the same problem, I hope this post is helpful to you.


What I use:

  • Maybelline Super Stay Concealer 24HR in light: this is a drugstore product that works really, really well without setting into lines. Unlike many concealers out there, this has a peach tone which works great to conceal darkness on cool tone skins
  • MAC Studio Sculpt Concealer in NW 20: I know MAC has a ton of concealers with different textures but this one is the easiest to use. The texture is mousse-like and I can blend it with my fingers. Definitely a nice product to use when I'm in a hurry
  • MAC Mineralize Concealer in NC 20: I got this as a gift and since it's a cool-tone product, it doesn't work that well to conceal dark circles (you need to use a concealer with an opposite tone to your skin to conceal darkness on your face.) However, it has tiny pearlized particles that reflect light so I use it for a different purpose: to highlight.
 Let's get to work, shall we?


 First of all, here is how I look without any under eye concealers. I have a few fine lines and bumps around that area. The bumps make it tricky to conceal as too much product can make that area look cakey.


I decided to get a lil' bit creative and used the Maybelline concealer on my right eye (your left, the one with the dots undearneath) and MAC Studio Sculpt on my left (your right)


I blended the concealer on my right eye with my finger and used a small dual fiber brush like MAC 188 to blend out the concealer on the other eye. Yup, that was moi looking quite mad while blending out concealer (which, btw, I think is the key to success here: you need to look mad so the dark circles would stay quiet and take the concealers like they should!)

After I blended things out, things started to look like this.


But wait, there's more! This is when the Mineralize Concealer comes handy: I've found out that in order to completely take away the darkness and brighten up the whole face, I need to add some sort of luminizer to this area. The Mineralize Concealer has this wicked wand that can reach to small places like none of your bidnez. I feathered it out like this, waited for a couple of minutes for the concealer to thicken a bit before I blended things out with the small dual fiber brush.


And here is the end result:

You have seen this picture before in the Benefit post. I used the concealers here and foundation/primer from Benefit. The products I use in this post are excellent. The trick to make them work is to use a small amount of product and let it get a bit tacky before you blend out. Please don't pile on your makeup but work them into your skin. MAC has reliable concealers and if you are loaded, try Cle de Peau. That thing costs around 70 bucks but from what I've heard, it's the best in the biz.

Also, I wrote a post about how to create beautiful skin with makeup. This is essentially what I do these days to get that porcelain skin that celebrities have. Believe me on this one: when it comes to skin, less makeup is more. And if you haven't had a dual-fiber brush in your kit, please get one. It's a gift that keeps on giving. I've never been happier since I started using this brush again.

If you give this a try, please let me know what you think. I'd love to hear from you!

With love,
Dao xoxo

P.S: Please show your support by following my blog and subscribing to my feed. Thanks a lot!

A Fail-Proof Guide to Natural-Looking Skin

Hi everyone,

Our weekly dose of Polyvore is here! Lately, as I leafed through magazines, blogs, and other beauty medias, all I have seen is beautifully made up skin. Porcelain skin is in and my bet is it's going to stay for a year or two. This skin trend, while looks so simple and easy to do, in fact requires a lot of skills. But fear no more! With the help of Polyvore, I compiled a list of favorite products that will help you achieve the Hollywood skin status in no time. And the catch? We only need 1 brush!

Let's do it!

Fail-Proof Guide to Natural-Looking Skin


1. Prime your face
I'm not even kidding! Face primer is one of the top products that changed my life, makeup-wise, of course! The 3 products I select are (1) L'Oreal Studio Secrets, (2) Bare Minerals Prime Time, and (3) Urban Decay Pore Perfecting primer. These 3 are good and Prime Time is designed for mineral makeup so it's a bonus.

2. Conceal, conceal, conceal!
Srsly, the secret to flawless skin is concealer. I chose Benefit Boi-ing, Chantecaille, and Maybelline Super Stay 24hr concealers. I didn't add Cle de Peau concealer because it's tres expensive but it works really well though. Except for the Chantecaille, I tried them all out, even the Cle de Peau so I can vouch for their goodness.

The trick of blending out concealer is not to use a concealer brush. I've used one since forever and guess what? My face always ended up cakey. But once I switched to MAC 188 brush and voila, cakey no more! Only fresh and wide awake face that looks 10 years younger!

3. Foundation
The 4 I selected from MAC, Shu Uemura, Neutrogena, and Benefit are all good. The MAC Mineralize Satin Finish is the one people use for editorial photos as it has a beautiful and ethereal glow. I'd say you should use it for parties and events at night only. Shu Uemura Face Architect is light and awesome! You don't feel like you are wearing makeup at all! The same with Neutrogena Healthy Skin. Last but not least, Benefit Flawless Oxygen Wow is going to give you that glow without any extra highlighters. It also has vitamins C and E, which is an added bonus.

I also use MAC 188 brush to apply foundation because it can fit into small nooks and crannies. Also, I am lazy and I don't want to wash both MAC 187 and 188 :)

The trick to applying foundation is quite simple: you use the minimal amount of foundation and you blend like mad, that's all! Seriously, you should spend more time blending out foundation and you'll notice the difference. I personally think people tend to apply their liquid foundations way too fast.

4. Powder
There's no doubt that Make Up For Ever HD Powder is the one when it comes to translucent setting powder. And the ELF HD Powder is an exact dupe as they both have micronized mica as the main ingredient.

The trick to use this product without making your face look ghostly is to use a tiny bit of powder on the puff and roll it onto your skin. Using a powder brush is too much for this, btw.

So yeah, there you have it: My Makeup Blog's official guide to natural-looking skin. You do this often and people won't even believe that you have makeup on.

Practice and have fun, you guys!

Love,
Dao xoxo


P.S: Love the weekly Polyvore installment? Please show your support by following my blog and subscribing to my feed. Thanks a lot!

Who Makes the Cutest Samples? Benefit Does!

Hey y'all!

Sooo... I came home after taking my mom to the hospital for an eye surgery (don't worry, Momma MMB is fine!) Upon entering the living room, I saw this cute bag and my mom asked me what was inside.

Me: Some samples, mom.
Mom: From whom?
Me: Benefit.
Mom: Never heard of it *paused* Really? There's a makeup brand called Benefit?


Benefit Cosmetics finally came to Vietnam a few months ago and I'm seriously in love with their Coralista blush. The product packaging is always cute and quirky. On top of that, the products are decent. I received 2 samples of face products in the bag. Since they are not that small, I assume that they are deluxe samples. The Hello Flawless Oxygen Wow foundation has 5 ml of product and That Gal face primer contains 7.5 ml. I'm so glad I got these samples as I've wanted to try Oxygen Wow for ages!


(L-R): a dot of Hello Flawless Oxygen Wow in Believe in Me Ivory and a dot of That Gal
I was very surprised that Believe in Me Ivory matches my skin perfectly. Before, anything with "ivory" in the name screams "too light!" to me. But recently, I've used a few foundations with this word in it and they match! Even an NC 25 foundation is too dark for me now.

With that said, I used a tiny bit of That Gal underneath Oxygen Wow. Since this is the first time I use it and it's also a humid day, I don't think it works that well as a face primer. However, Oxygen Wow is amazing! It is really liquidy and feels like my Sunplay sunscreen on my skin. At first when I applied, it looked a tad lighter but once everything settled down, it was the perfect match!

But that's not it. While it doesn't look like a lot of coverage on my skin, it actually looks really unbelievably good on film. It's like my natural skin but better. I mean, if you don't believe me, just look at this picture:

See what I mean?
Beside That Gal and Oxygen Wow, I used a bit of concealer to hide away my raccoon eyes, a bit of mascara and eyeliner on my eyes and a dab of gloss, that's it! I didn't even bother using blush, highlighter, or contouring powder. Yet, my face looks amazing and I have the glow from within!

Srsly, thank you so much, Benefit, for making this foundation! It does feel very comfortable and for those who have oilier skin, you should use some powder on top. By the way, I just found out that Believe in Me Ivory is the lightest shade and I'm about NC 20 now, which means those who have lighter skin than me is kinda out of luck. I wish Benefit could have some lighter shades, though :(

Also, here's the deed: if you don't have severe raccoon eyes type of dark circles, you can mix a bit of Oxygen Wow with That Gal and apply it like a concealer onto the under eye areas. It immediately illuminates your eyes without you having to use heavy concealers.

Ingredient list for That Gal
Ingredient list for Hello Flawless Oxygen Wow
Ok, that's all for today, folks!

Oh wait, wait! It isn't. Did you notice anything different? And by "anything different", I mean in picture quality?


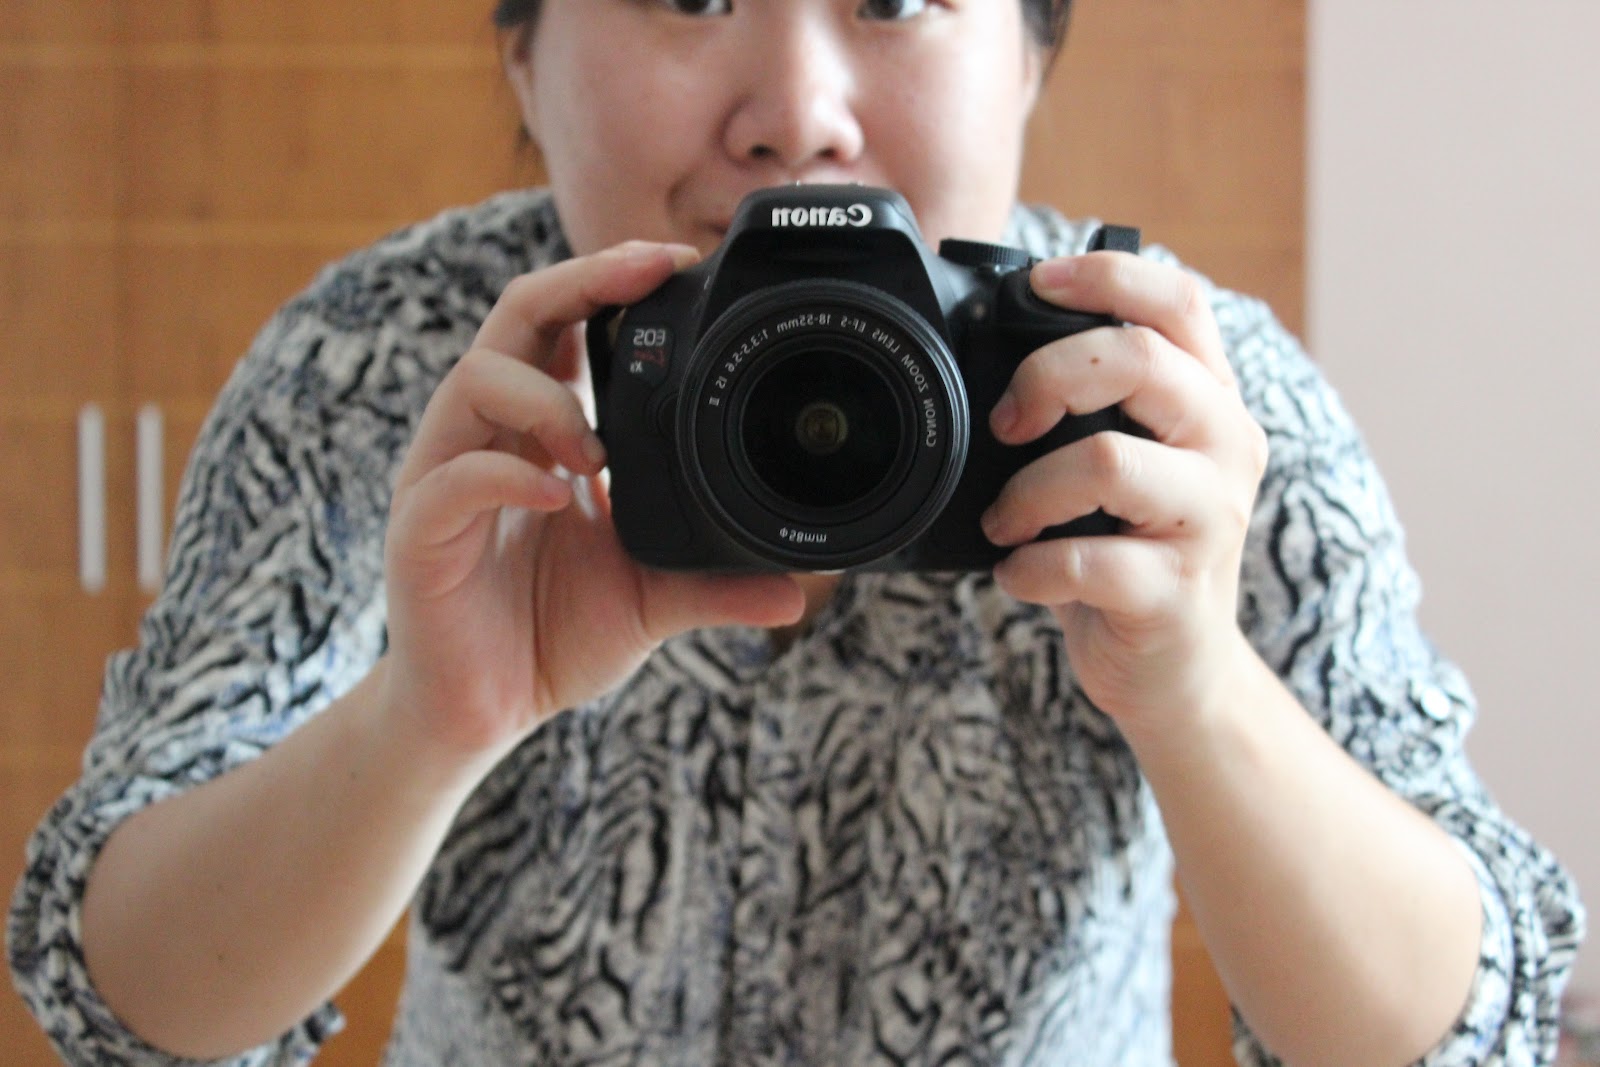
After a couple of months of intense savings, I finally had enough money to buy my very first D-SLR. After a lot of debates, reading so many many photography blogs and YouTube videos as well as listening to some of my friends who are pro photographers, I finally settled with Canon 600D (T3i in the U.S/Canada, Kiss X5 in Japan.) Since Canon just released 650D, the price of 600D came down a bit. I was in luck as the camera shop near my place had a sale on this particular model on top of the already marked down price. The camera + 18-55mm kit lens +  16GB SDHC card cost me a grand total of 650 bucks!

After bringing it home, I decided to call my new camera Sookie. Every time anybody attempt to touch my camera, I can yell out, "Sookeh is maihn!"

Yup, once a True Blood fan always a True Blood fan.

Sookeh is maihn!

By the way, dear readers, can you do me a favor? Can you let me know if it takes longer to load up my blog? Since the Canon 600D has higher resolutions than my good old G12, I wonder if loading time is going to be a problem.

Thanks, everyone!
Dao xoxo


P.S: Please show your support by following my blog and subscribing to my feed. Thanks a lot!

A Review of some Essential Makeup Techniques

Hi everyone,

Recently, I posted a FOTD called "I'm not Me" and you guys seemed to like it very much. I actually posted a picture from that look on my Facebook account (which remains private, btw) and many, many of my friends asked me how I did it. I thought long and hard about it because of various reasons.

While it is somewhat of a transformative look, it requires a lot of skills that I have acquired throughout the years. As I thought of doing a tutorial for it, I realized I have done a couple of tutorials on techniques used in that FOTD already. Some of them I need to redo as I used a different camera then and the photos were not up for snub. I know I haven't done tutorials on magic line and cheek color technique yet but you guys should expect to see them here soon. Compared to cutting the crease and contouring, these two are quite painless, actually.

Therefore, this post is not a tutorial on how I did the "I'm not Me" FOTD but a review of some essential makeup techniques everybody should master. This year, surprisingly, makeup is not all about colors but more about skills. It's all about what you can do with the minimal amount of makeup to look exceptional and flawless.

So here we go, a review on cutting the crease, contouring, and highlighting.

1. Cut the Crease

I first did a FOTD on cut the crease back in 2010 and believe me, I had the hardest time with it! Of all the makeup techniques I've learned, this has to be one of the toughest for me since I don't have a defined crease line. The crease is the place where the concave part of your eye meets the flat part. If you are Caucasian, African, Hispanic, or Asian with big eyes, the crease is very easy to find. It is right there! All you need to do is to close and then slowly open your eyes: the line isn't there when you close or semi-close your eyes but once your eyes are wide open, you'll see it.

Source
The model in the above picture has defined crease line. For those with eye shapes similar to me, you have to feel around your eyes with your makeup brushes to find where the concave meets the flat part.

In 2010, my three favorite brushes for cutting the crease were MAC 217, 219, and 266. Now, I use EcoTools angle liner brush for cutting (it's similar to MAC 266 but thicker, which makes placing the line a lot easier), ELF defining eye brush for placing the color on the crease, and of course, MAC 217 for blending.

I found this tutorial on YouTube on cutting the crease. It is not what I do but for beginners, it's quite easy and doable. (And also, it makes me want to do a cut a crease tutorial again. Very, very much!)

2. Contouring and Highlighting

For contouring and highlighting, I would forever refer to this image from Kevyn Aucoin's book "Making Faces" (review here)


Robert Jones also wrote a book called "Looking Younger" with extensive contents on highlighting and contouring. I also learned so much about this topic from it as well.


If you want to see how I contour my face throughout the years, here are a few links:


Cutting the crease, contouring, and highlighting are advance makeup techniques. They are hard to do right. And why should we bother to do them anyway?

Because, boys and girls, makeup is essentially the game of lights and shadows. Once you apply foundation on your face, those lights and shadows are erased. By doing all of these techniques, not only do you bring back the lights and shadows on your face but you get a chance to enhance your features. Just think of them as the tools you use to chisel out your face.

These two techniques do take time to master but once you do, the payoff is fantastic. It's like you get to know your face all over again or getting the face that you want. Makeup is very deceiving and in order to get what you want, you need to practice, practice, practice!

That's all for today, folks! I do believe that once in a while, we should brush up our skill sets and I hope this post inspires you to delve more into cutting the crease as well as contouring and highlighting. If you have any tips on these two topics, I'd love to hear from you.

Love,
Dao xoxo

P.S: Please show your support by following my blog and subscribing to my feed. Thanks a lot!

The Neck-Face Discontinuation Conundrum

Hi everyone,

Since forever, my face has always been tanner than my neck and chest area. If you flip through My Makeup Blog's FOTD section, you can clearly see that. For example, here's a picture to show how my face was darker than my neck:

Yup, face was about 2 shades darker than neck!
Sun exposure plus bronzer around the jawline to contour leads to that discontinuation between the face and the neck. In makeup, there should not be that distinction between the two areas. If the problem was reverse (neck darker than face), the solution is pretty simple: some foundations on the face to even things out. But the face darker than neck problem is harder to solve.

I read literature on this problem and a lot of makeup artists have advised to apply a darker liquid foundation on the neck and chest area. I have seen this on the works of a lot of MAC makeup artists and the results were not pretty. Liquid foundations melt. They also transfer. Just imagine dark liquid foundation transferring to the upper bodice of a white wedding gown. Yuck!

Another method is to get a spray tan to match the color of the chest and neck area to the face. However, not all people can get access to spray tan salons. Some people don't even like tanning per se.

The most viable solution came to me when I watched "America's Next Top Model." I noticed a model had the same problem as I do and the makeup artist for that shoot applied liquid bronzer to her neck and chest using upward strokes. Genius!

I basically glued my eyes to the screen to see the makeup artist using a foaming kind of liquid bronzer without any shimmers. It looked really natural on the model's skin and totally matched her pretty tanned face. This makes sense to me because liquid bronzers usually do not melt away like foundations do. On top of that, they are light and the staying power is good. Now, don't get confused between liquid bronzers and self-tanners. The later clings on to your skin for weeks and some of them have those weird yellowish tints.

So there you have it, the solution to the neck-face discontinuation conundrum. A little bit of liquid bronzer saves the day :)

With love,
Dao xoxo

P.S: Please show your support by following my blog and subscribing to my feed. Thanks a lot!

A Beauty Blender Dupe, Maybe?

Hi everybody,

Recently, I went to my favorite nail place to look for an oyster white nail polish. Although I could not find one, I ended up getting a makeup sponge that looks like a Beauty Blender and a glass nail file. Since I was low on cash, they were the only things I got but happiness can come in small dosage, right?

The beauty blender dupe I found cost me around $2.25 USD
 For a while, I have been curious of the Beauty Blender. It's one of those egg shape sponges that you can use instead of makeup brushes to apply foundation on your face. The only thing that stopped me from getting it was the price: the Beauty Blender costs around $20 and for that price, I can get a decent foundation, stippling brush, and powder brush from E.L.F with some change dangling in my hand.

But I was curious of how well it would work. Since I have been using brushes for so long, applying anything on my face with a sponge has become a novel concept to me. So I bought the Beauty Blender dupe, fully knowing it is not the real deal. It is made of latex and shaped like a gourd but for an all-in-one face applicator, I had to give it a try.

In the pictures below, I applied mineral foundation, concealer, face powder, blush, bronzer, and highlighter with only one tool: the Beauty Blender dupe.

Me with the BB dupe in incandescent light without flash
Same condition but with flash
So what do you think? It works, yeah? The whole application process was fast. I used the pointy part to apply foundation, then used the flat end to pound it on my face to ensure adherence. Then, I used the same pointy end to apply concealer under my eyes, then contour my face and nose before applying blush and highlight. Afterwards, I used the flat end to apply powder. The whole process took me less than 10 minutes and I'm glad I did not have to switch tools in between steps.

However, the biggest pain was how much mineral foundation it ate up. The amount that I used to get a thin and naturally looking layer in those pictures could be used to apply two layers for a full coverage if I used my ELF powder brush. Since I don't use liquid foundation, I don't know how much it will eat up but I suspect it is not a small amount, either. Therefore, I suggest to dampen the sponge before using foundation with it.

Overall, I enjoy this Beauty Blender dupe very much. I know it is not a real deal but it works well for me. Also, the curve in the middle gives me a better grip. I guess it is a nice tool to bring in case I go on vacation. Instead of bringing 3 or 4 face brushes, I only need this one. However, it takes a whole day to dry so I may end up buying another one just in case.

On the other note...

The Laptop Strikes Again!

My laptop was being a pain and it has been cutting me off right when I needed it most. Since I'm making a living from writing, this has been particularly hard as I know I need a replacement laptop instead of a quick fix on this one. Nevertheless, the day is coming soon and I have an eye on Asus (the regular one, not Zen book which I want but costs as much as a MacBook Air!)

I'm a P90X Grad!!!

Yup, last Saturday was the last day I did P90X. I felt exhilarate and sad at the same time. In one hand, I finally completed one of the toughest workouts ever produced. But on the other side, I was sad that it was over. P90X is a lot of fun and I am going to do another round starting in July.

Right now, I am doing Brazil Butt Lift and it has been kicking my behind! During the last 10 minutes of yesterday's work out, my legs were quivering under me. I had to stop the DVD several times in order to catch some breathes. I thought P90X was tough but this one is even tougher! I'm glad I chose to do BBL as I know my lower body is not that strong.

That's all for now. I hope you are having a good day!

Love,
Dao xoxo

P.S: Please show your support by following my blog and subscribing to my feed. Thanks a lot!

Review: Maybelline Clear Smooth BB Silk Shine Free Two Way Cake Powder

Hi everyone,

Last Sunday, I went to a friend's wedding and literally had 5 minutes to do my makeup. While I was doing my eyes, I realized I had about 15 minutes to get to the premise before the reception started. Chop, chop, Dao! I had no time to do some fancy foundation routines so I grabbed the best option possible: Maybelline Clear Smooth BB Silk Shine Free Two Way Cake Powder.


Exhale. What a long name for a makeup product. I did have lots of fun at the party and my makeup was simple yet flawless. Also, I learned a lot about this foundation that day, too!

First of all, last Sunday was not the first time I used this product but it was the first time I wore it out. About a couple of months ago, I was looking for a finishing powder since my HG The Ultimate Powder was running quite low. I went to my trusted makeup/nail store and asked one of the sales people there if they had a good finishing powder. They did, but most of them were out of my reach. One girl suggested me to try this Maybelline BB Silk two way cake powder to use as a finishing powder. I looked at the price tag and since it wasn't so bad, I bought it.

At home, I tried it out as a finishing powder and it was a cakey mess! Turned out, a two-way cake powder is not a finishing powder. It is a pressed foundation that can be used wet or dry. Think MAC Studio Fix Powder Plus Foundation but with less silicone and way less coverage. I wish to know that back then so I could chalk up a little bit more cash to get a loose powder instead.

However, it was not all lost. As a sheer coverage foundation, it works well when I use a primer underneath. The oil control property was good as I left the party without looking shiny. However, since it does have chemical sunscreen, I did feel some tingling when I did not use a primer. When used wet, it darkened significantly but the coverage did not improve.

Here are some photos for your own perusal:

 I love the soft lavender of this packaging. It's very sweet. Like Studio Fix Powder plus Foundation, it has a bottom compartment to store the sponge. It was made of good quality latex and believe it or not, I got the best coverage when I used it. The powder brush just makes my foundation look too heavy and cakey. This foundation is not the blending type at all!


 My shade is in Nude Beige (shade #2). It looked perfect after I applied to my face but about 5 minutes later, it began to oxidize to a shade darker. I should have bought shade #1 instead but it looked really, really pale. I wish the shop had testers, though. Makeup is non-refundable here :(

 A little bit about the "BB Silk" thing: I guess you guys already heard about BB Cream. It is supposed to be the best foundation/skincare product out there right now. Maybelline also has their own BB cream but I didn't buy it. This BB Silk two-way cake powder is supposed to be the powder rendition of the BB cream, I guess. It is really silky and glides on smooth without feeling heavy unless you overload it. Like BB cream, it is not supposed to give you a lot of coverage.

 The ingredient list.

The swatch. It's the darker area closer to the lower edge of the picture
When I took this picture, everything looked fine and dandy but immediately after I put my camera away, it oxidized into a darker shade. Grrr!

And finally, how it looked on me:


See, no shine at all! I love the oil control power of this thing. However, look how tan my face was compared to my neck. This picture was taken after the party so it had plenty of time to show its true color already. Don't you hate it when your foundation oxidizes?

Overall, I would give this product a B. While it does what it is supposed to do, it also manages to oxidize, which is a no-no to me. I believe this Maybelline BB Silk powder is a product for the Asian market. If you only need a sheer coverage powder foundation, this would do. But remember to get one that is a shade lighter than your skin color as it does oxidize.

That's all for now. Have fun, everyone!

Love,
Dao xoxo

P.S: Please support by following my blog and  subscribing to my feed. Thanks a lot!

Popular Posts

Powered by Blogger.